Loading...
The following tutorial will show you the basic steps through a simple object creation and mapping process. Furthermore it explains the pattern to export to an x-file from gmax. This topic assumes that you are familiar with the basics described in the introducing chapter.
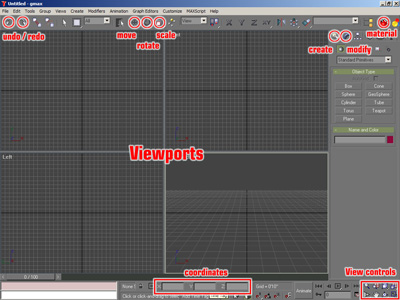
All most important features to start with are outlined in red.
1. Click on Box in the create tab.
2. Draw the Box with the mouse in the front view (upper right viewport), by left clicking and holding the mouse to define the front face size. Once the mouse left click is released, you can continue moving the mouse up and down to determine the depth of the box.
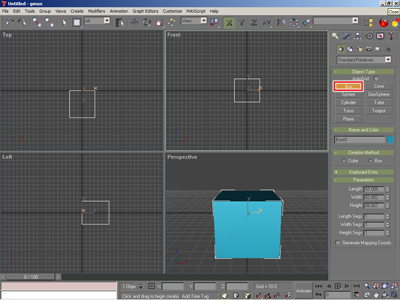
Once the box is created, you will need to assign the texture coordinates to the object in order to define how the texture should be displayed on the surfaces of the box.
Therefore go to the Modify tab while the object is still selected (object is outlined white while selected) and apply a "UVW MAP" modifier from the pull down list to the object.
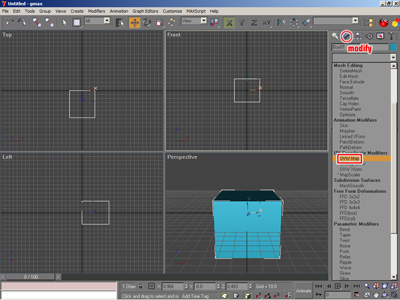
Once the "UVW MAP" modifier is applied to the object, you will see an orange outline that shows you how the texture is projected on the object.
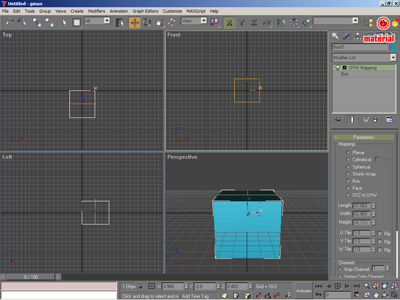
The last setup before exporting the X file you will have to apply a material with a diffuse channel to the object so that Pandoras Box can use this texture channel to map images on it. To create a new material click on the Material icon or use the keyboard shortcut "M" to open the Material Editor.
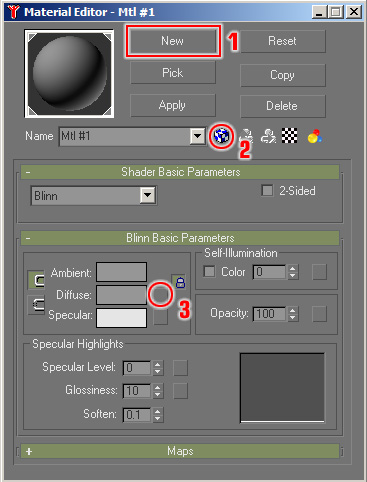
1. Create a new material
2. Toggle checked box to show texture in shaded viewport
3. Click on square box of the Diffuse channel
Choose bitmap from the dialog to assign a bitmap to the diffuse texture channel.
Next choose a bitmap from the opening file browser.
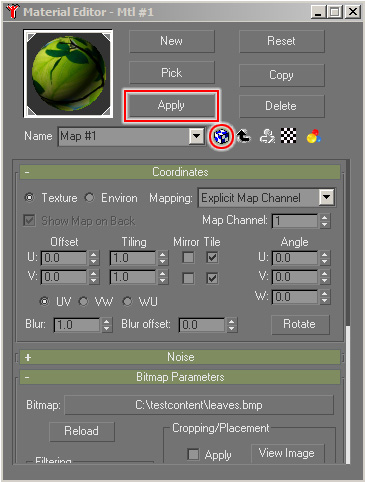
Now apply the material to the selected object by clicking "Apply" and you should be able to preview your mapping in the perspective viewport of gmax right away. If you do not see the texture in the viewport, the object was either not selected, the checked box not toggled or none of your views is in shaded preview ([F3]).
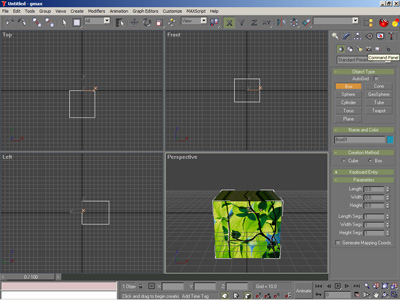
Before exporting the object for Pandoras Box you will have to make sure that it's placed correctly, since the 0,0,0 is relevant for the pivot point of an object once this is used in Pandoras Box.
To place the object right in the center, use the move tool from the main toolbar in gmax.
As last step you have to export your file as X file, for further information please see:
- Gmax Object Export for PB Vers. 4.1 or
- Gmax Object Export for PB Vers. 4.5.