Loading...
This chapter explains which settings you can choose when converting images with the Image Converter. Please see the introductory chapter for general information about the Image Converter and links to other topics that explained how to load and save images.
Remember to click the "Convert" button if you change a setting and like to see the result in the image on the right side.

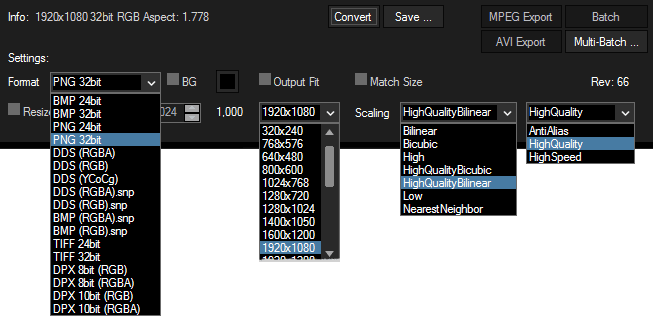
Choose an output image format from the drop-down list : BMP, PNG, DDS, TIFF or DPX (8bit, 10bit). The formats labeled "24bit" or "RGB" do not support an alpha / transparency channel whilst the versions with "32bit" or "RGBA" do support it.
See the chapter "Image Formats" for information about the formats (including snappy) and when to choose which format.
By default this option is disabled which means that converted images keep their original size. If you would like to resize images, enable "Resize" and either enter new values for the width and height manually in the text fields or choose a setting from the drop-down list. You can also change the scaling mode which is set to "HighQualityBilinear" and "HighQuality" by default. Note that the aspect ratio from the image(s) is displayed next to the "Width" and "Height" fields. So if you enter a size of 2000x1000px, the new aspect mode will be 2,0.
If you would like to keep the native aspect without calculating both sizes, enable the check box "Match Size". Now enter a "Width" or "Height" and click the "Convert" button. A new text appears to the right side and shows which size was automatically calculated, based on the smaller number that was entered in the Width/Height text fields. For example: If the original aspect is 2,0 and the Width/Height fields were set to 1000x200, the calculated size will be 400x200. If the Width/Height fields were set to 200x1000, the calculated size will be 200x100.
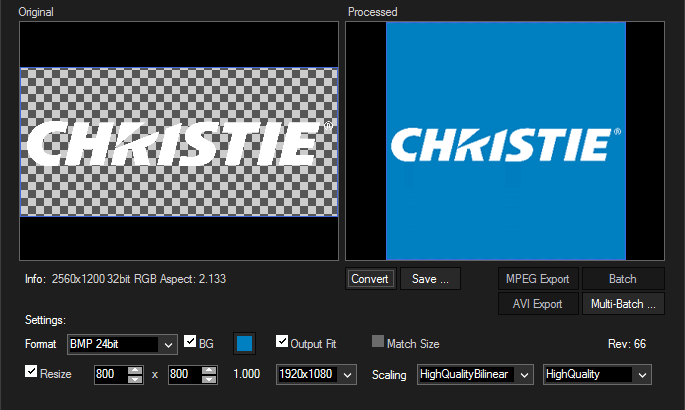
Alternatively you can set the option "Output Fit" which allows to resize an image to a size with a different aspect ratio without stretching the content. The "old" image is placed within the canvas with the "new" size in a way that it fits either the height or width. The rest of the canvas is either transparent or filled with a background color if "BG" is checked. This option allows to replace transparent image parts with a background color. Enable the option "BG" and click on the small black box to choose another background color. The background color is also applied if you are converting an image with transparency to a format that does not support it, see above.
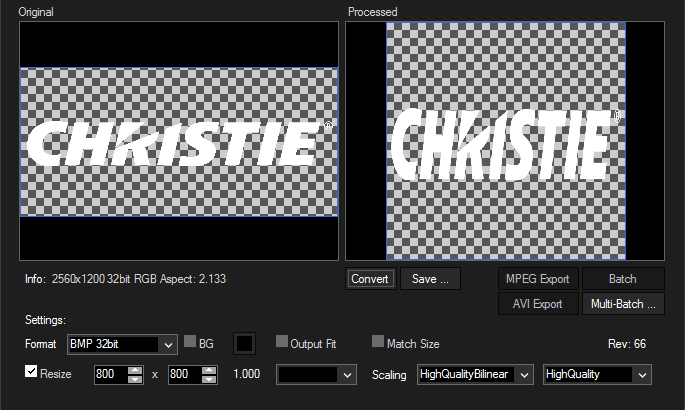
The first example on the left side shows that the input image (size 2560x1200 px) is resized to 800x800 px. The original aspect ratio is not preserved and the image is stretched. The output format is set to "BMP 32bit", which is an uncompressed format supporting transparency.
For the second example on the right side, the same size is applied. But this time, the option "Output Fit" is checked so that the image is resized but not stretched. The background option "BG" is checked and a light blue color is chosen. The output format is set to "BMP 24bit", which is an uncompressed format not supporting transparency.
 |
 |