Loading...
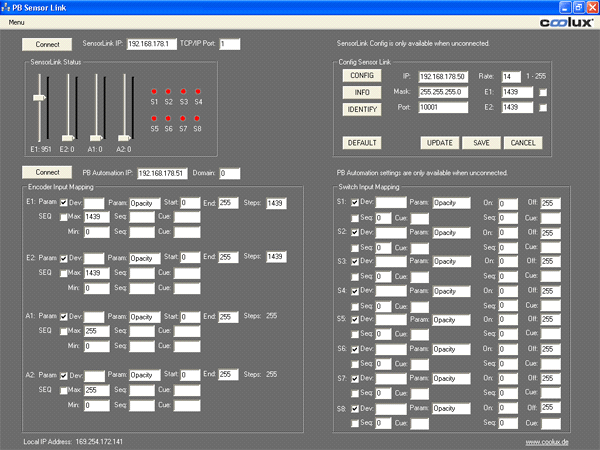
To configure the Sensor Link device, please enter the Sensor Link IP address and port in the top left fields, do not press connect at this time.
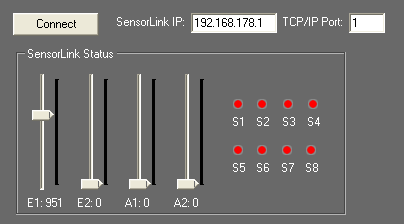
Press [CONFIG] in the ConfigSensor Link box.
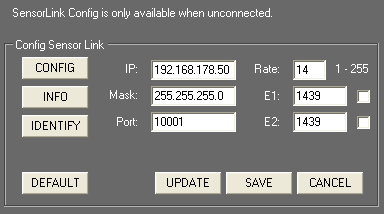
[CONFIG]
When [CONFIG] is pressed the left LED will blink and the Sensor link is switched to config mode.
[INFO]
Press [INFO] to retrieve the current settings of the Sensor links into the settings fields.
[IDENTIFY]
Press [IDENTIFY] to identify the units, the right LEDs will blink for 3 seconds.
Changing the Sensor Links Settings
[DEFAULT]
Press [DEFAULT] to load the default settings in the settings fields.
IP
Please enter the new IP address that you want to assign to the unit here.
MASK
Please enter the new Subnet Mask that you want to assign to the unit here.
PORT
Please enter the new TCP/IP Port number that you want to assign to the unit here.
RATE
The Rate setting changes the transmission rate, the default of 14 is recommended as this is ~70 Hz refresh cycle in order to be ahead of any displays refresh cycle. Faster rates (<14) are possible but may cause your network or processor to slow down.
E1
Please set the step count of your encoder 1 here.
E1 Checkbox
If you need to use an external index GPI switch to reset the encoder 1 counter to 0 you may check this box and enable switch S7 to be the index switch.
E2
Please set the step count of your encoder 2 here.
E2 Checkbox
If you need to use an external index GPI switch to reset the encoder 2 counter to 0 you may check this box and enable switch S8 to be the index switch.
UPLOAD a new Configuration to Sensor Link
To upload new settings into the unit, press [UPDATE].
Press [SAVE] to store the new settings into the unit.
The save process takes several seconds and will reboot the unit.
Once all LEDs light up again the unit exits config mode and is ready to being connected for data transmission.
You may press [CANCEL] at any time to leave the config mode directly.
RUN Mode
Once all settings are stored into the unit, you may connect to the Sensor Link device for data transmission by entering its IP address and port and pressing the [Connect] button.

If you do not know the current IP address, you might want to use the default IP 192.168.178.50 and Port 10001.
Please note that your PC must be in the same IP address range in order to communicate with the Sensor Link Device.
Once connected, you should be able to read the incoming values in the Sensor Link Status box. To check the switches, you may want to connect the 12V pin with any of the switch pins, the switch status S1-8 will turn green once the contact is closed.
Please do not short circuit the 12V (left most pin) with the ground pin (right most pin), this might damage the unit.
Triggering Pandoras Box from Sensor Link
In order to communicate with Pandoras Box, you need to define the function of the incoming data via Sensor Link.
For each Encoder and each switch you may choose between parameter and sequence trigger mode. Use the checkboxes to set each input up for the according mode.
Encoder and Analog Inputs
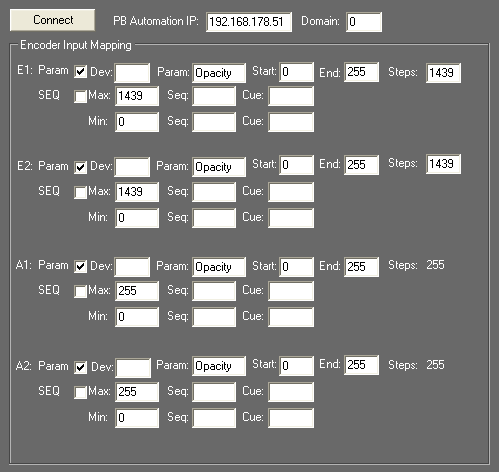
Parameter Mode:
In Parameter Mode you may enter one or multiple devices to be linked to the incoming values.
Device Selection
To enter a single device like Server1 Layer 4 enter in the Dev field: "1,4".
To enter multiple devices, leave a space between each device like: "1,4 2,4 3,4" this setting will route all incoming data to layer 4 of machine one, two and three.
Parameter Setup
Please enter here the desired parameter name that you want to link to, like "Opacity" or "X Pos".
Start and End values
Please enter here the start and end value range that you want to map your incoming data to.
Steps
Please enter the amount of steps of your connected device (for encoders only). While the Encoder Step count is determined by the hardware connected to the Sensor Link, any analog input device can be read between 0-10V with a step count of 0-255.
Sequence Mode:
In sequence mode you may enter the desired sequence and cue to be triggered above or below the incoming min. and max. values of the connected Encoder or analog input device.
Switch Inputs
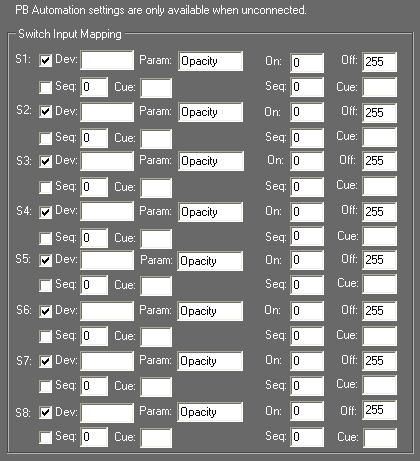
Switch inputs are handled similar to encoder inputs, besides the fact that you can setup only an on and off value in parameter mode. In sequence mode you may choose a sequence and cue separate for the on and off state of the switch.
Sensor Link Data Transmission to Pandoras Box
In order to connect to a Pandoras Box Manager System your PC must be in the same IP address range and you will need to enter the Managers IP and Pandoras Box domain in the according setting fields and connect to Pandoras Box.

Please be aware that once the connection to Pandoras Box is enabled the Sensor Link user interface will pause all interface updates of faders and switch states for optimum live performance.
Resetting the Unit
To reset the Sensor Link, please press the reset button on the rear side of the unit and hold it for 5 sec while power-cycling:
Power off the Serial, press the reset button, power it on again and hold the button for 5 sec pressed.
When the unit is reset the following settings will be set:
IP: 192.168.178.50
Subnet-Mask: 255.255.255.0
Port: 10001
Troubleshooting:
Problem: The incoming data comes in slowly and does not update fast enough.
Solution: Press cancel to exit config mode and reconnect to the Sensor Link unit or power-cycle the unit to exit config mode as well.
Problem: You caused a short circuit because of connecting Pin 12 (+12V) and Pin 1 (Ground).
Solution: There is an internal fuse inside the Sensor Link that has to be replaced. Please contact Support.pandorasbox@christiedigital.com