Loading...
Pandoras Box provides the ability to use shapes and objects for any display output to be rendered to. This tutorial is intended to show the basic steps for correcting curved screens. If you are interested in warping please have a look at the Warper too. It was developed by us to ease the warping process and provides specialized tools to optimize the workflow.
As gmax is a extensive and powerful 3D modeling tool we will only scratch the surface of 3D modeling in this tutorial.
Geometric correction has to be set up on-site with the projector hooked up to your system and running gmax in full-screen.
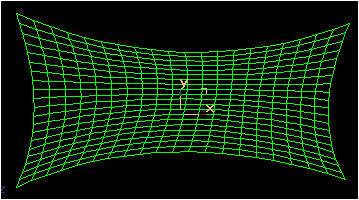
In order to get started, make sure that gmax is installed properly on your system. If you need to work from a distance, use a remote desktop viewer like Real VNC to mirror the output of the projectors on your laptop or PC.
To gain a maximum warping area, make sure that the Windows taskbar is not set to be "on top of other windows" by right-clicking on the windows taskbar and choosing its properties dialog.
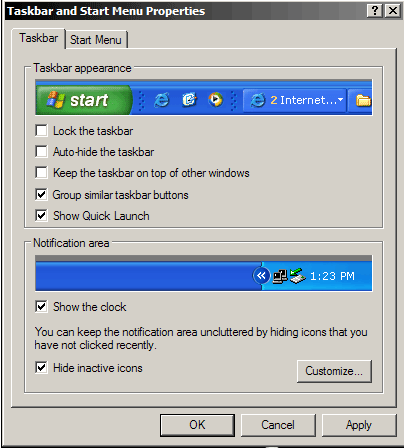
Start gmax.
If you need to setup two outputs simultaneously, start gmax in Desktop extended mode once for each screen so that you can edit two warping grids at the same time.
Once gmax is started it is recommended to adjust the following settings for a better workflow during the screen shaping process:
First of all we want to make sure that the background is all black and that all lines to be edited turn to primary green. This makes it much easier to see the grid in most lighting conditions.
To do this, click on Customize User Interface in the Main menu. Follow these steps:
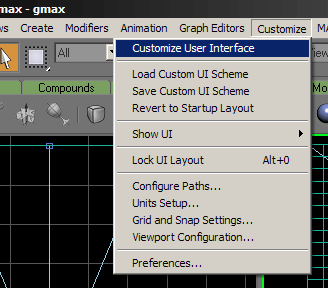
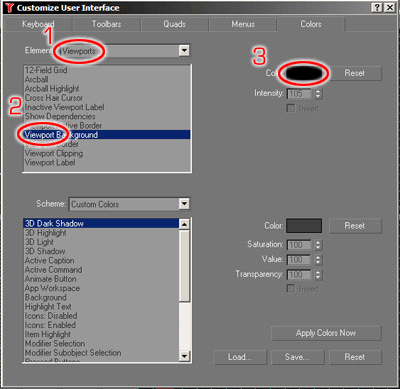
1. Select Viewports from the Elements pull-down menu
2. Choose Viewport Background
3. Change the colour in the colour dialog to black
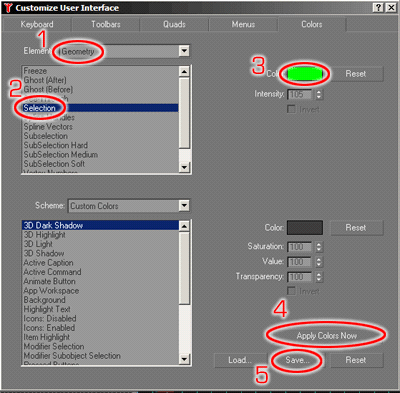
1. Select Geometry from the Elements pull-down menu
2. Choose Selection
3. Change the colour in the colour dialog to primary green
4. Apply the new settings
5. Save these settings for the future in File dialog by overwriting the
default colour file.
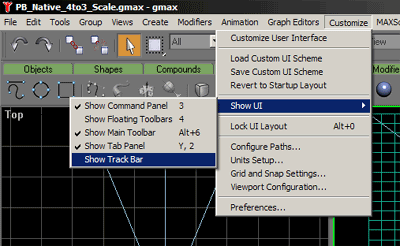
Last, make sure to hide the track bar from the main UI by u-checking "Show Track Bar".
Now you are ready to start warping! Please always make sure that your gmax is set up this way, these settings are important for working in expert mode with gmax in order to use the full desktop.
In this next section we will look at the basic deformation of a flat planar object. This tutorial is based on the steps explained in the previous chapters, please be sure to have downloaded the according gmax PB Native File and Exporter.
The most common task for screen shaping is a curved screen. To achieve this task, the planar object must be modified. The grid points have to be re-arranged in a way that the grid unwraps itself on the curved surface of your screen. To do this, all you need to do is to apply a tool that allows bending and shaping of planar objects.
In order to apply a new tool or a so called "modifier" in gmax, first select the planar object by clicking on it. Once it is selected it should turn primary green.
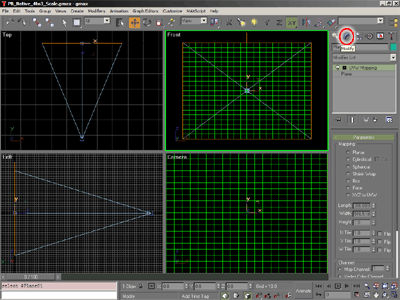
To apply a new modifier to the selected object you will need to switch to the modify mode by clicking on the "Modify" tab. Here you will see a hierarchy list of the history of the objects modifiers.
In order to apply a new one, select FFD 3x3x3 from the pull down menu.
 |
 |
Then open the FFD 3x3x3 modifier in the stack and click on the Control Point level. Now you should see a 9 point orange control point grid surrounding the planar object.
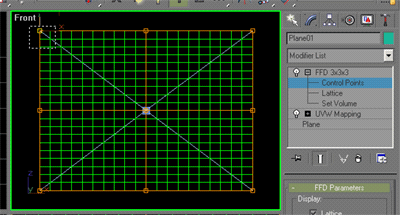
Since gmax and all objects are always treated as 3D objects, the modifier works also in the 3rd dimension. Therefore there are 2 more control points underneath each of the 9 points . Since the object that we want to modify is totally flat we need to make sure to always catch all three control points by dragging a selection window over the control points.
Now feel free to select and move the control points around to get a feeling of the dynamic behavior of the underlying planar grid according to the control points positions.
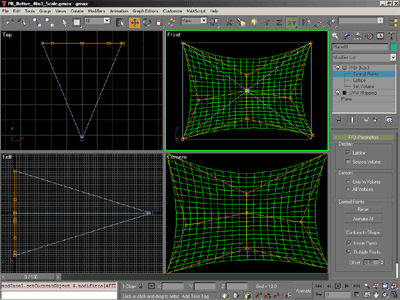
Please Note: Always make sure that none of your points moves towards the Z axis, all control points must stay at the same distance from the camera at all times. To control this, check your control points positions in the top and left view.
You might wonder how you can actually draw and shape this plane according to your screen, the answer is only a few clicks away.
In order to control the FFD´s Control points you are in the control point level of the selected objects modifier stack. Once you are in this mode you can right-click in the camera view and press [Ctrl + X] to toggle to the expert fullscreen mode of gmax. By pressing "W" on the keyboard you may toggle to the maximized camera view.
Now start modeling your planar object according to the physical shape of the screen.
If you need to toggle to the front view while in expert mode, you may use the "F" key for front view, "L" for left view and "C" for the camera view.
The last gmax chapter includes all available shortcuts.
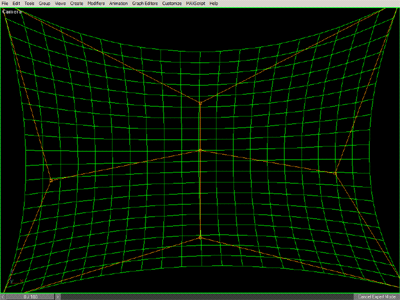
Please make sure that you make all adjustments to match your screens only according to the camera view, as this is your reference view for Pandoras Box output.
Once you're done with shaping the screen, you only have to export the selected object from the file menu and load the object into the output camera.
Anytime you need to get more detailed control over every grid point, explore the "edit mesh" modifier. Just add it to the stack and choose the Vertex level for in depth control of every segment of the shape.
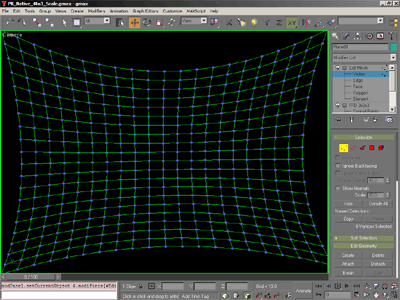
This modifier will do a great job when you do Softedge setups with over-laying grids. The Edit Mesh modifier will allow you to get the overlapping vertices accurately on top of each other for a perfect shaped Softedge blend.
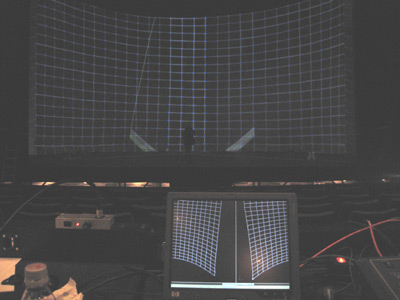
For this 180 degree screen, two gmax applications are edited at the same time. In the overlapping zone all vertices were touched up to match exactly the screen deformation.
Please export your file as an X file. as described in the previous chapters:
- gmax Object Export for PB Vers. 4.1 or
- gmax Object Export for PB Vers. 4.5 (and higher)