Loading...
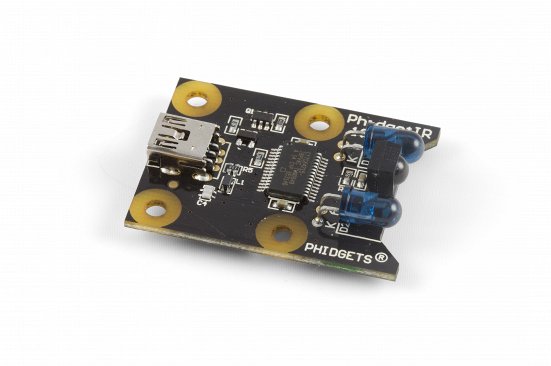
 PhidgetIR - P/N 1055_0B The Phidgets IR device is capable of receiving as well as sending IR code, like for example emitted by remote controls. It can be used to either program actions triggered by external IR signals, or to access functions of IR controllable devices such as projectors or BlueRay players.
Note that all Phidget devices are only available in the licensed Widget Designer edition, not the Free version. |
To add a Phidgets IR device, open the Devices menu and select Phidgets > PhidgetIR. This will open the Configuration dialog. Alternatively, you can add a new device in the Configuration dialog with the "+" button when the dialog is already open.
On the right side, you can name, dis-/enable the device or configure it as explained in the next paragraph.
The Type informs you about the type of device or connection. The Groups lists the groups to which this device belongs. The Name is the unique identifier for this PhidgetIR object in WD and the general rules for naming objects apply here as well: only letters, numbers and underscores are allowed; the first symbol must be a letter.
It is possible to change the default name to a more descriptive one. When scripting, enter this Name to access available members or use the Project object and device Type instead; examples are shown further down.
The Id offers an alternative way to address the device when scripting.
The "Enable" check box is ticked per default. On the left side, you should see that the icon in front of your PhidgetIR is a filled blue circle. An empty blue circle indicates an enabled device which is not connected. A filled gray circle indicates a disabled device.
You can close the dialog at any time. The newly created device will also be added to the Devices menu > Phidgets > PhidgetIR and can be opened from here or with Devices menu > Configuration.
|
The next step is to add the learned code to an IR Code Table.
Use the drop-down to select an existing code table or press the "+" button on the right side to create a new table.
If you want to delete the currently selected code table, press the "-" button, if you want to rename it, press the gear icon.
Pressing the "+" button below the drop-down will add the current code to the selected table.
You can assign a descriptive Alias to this code, like "Play" or "Shutter".
The Alias must abide by the general naming rules for objects (only letters, numbers and underscore are allowed, the first symbol must be a letter) and must be unique within this specific code table.
Remove learned codes from the table by pressing the "-" button to the left of the Alias.
After adding a PhidgetIR device, it can also be scripted which allows to perform actions on the device as well as retrieve information from it.
To send commands to the device, create a CustomScript button or anything with a scripting field. Enter the device's identifier name into the script field (per default that is e.g. "Phidgets_PhidgetIR1") and Script Assist will offer a list of all available members.
An important member of this device is the Send method, which is used to send a specific code from the device's IR diodes:
Phidgets_PhidgetIR1.Send("Phidgets_IRCodeTable1","Play",10)
For a list with all available members and commands with examples and descriptions, please refer to the chapter Phidgets IR Members.
As an alternative to explicitly naming the device, the "Project" object can be used. Choose the device type and address the device by entering its ID or name. Script Assist then offers you the same list of members. This is the alternative for the first example from above:
Project.Phidgets_PhidgetIR(1).Send("Phidgets_IRCodeTable1","Play",10)
Substituting the ID with a dynamic variable allows automation. Actions can be performed on many connections of the same type simultaneously, e.g. by using for-loops:
For i = 1 to 10 {
Project.Phidgets_PhidgetIR(i).Send("Phidgets_IRCodeTable1","Play",10)
}
The chapter "Project and Context Member" shows more examples with for-loops and if-clauses; of course, normal variables can also be used.
Event Listeners can be added in the Configuration dialog and provide a simple way of listening to triggers from connected devices.
Please see the chapter Event Listener and Group Event Listener for a detailed description of its functionality and the Phidgets IR Events chapter for a list (with examples and description) of the possible events raised by this device type.