Loading...
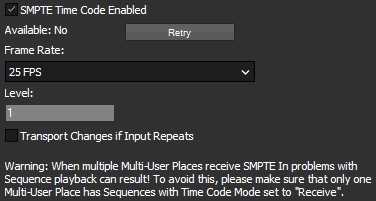
The section "SMPTE Time Code" in the Local category from the Configuration tab allows to set up timecode options for an attached SMPTE Link interface.

- Retry
Use the "Retry" button if you have lost communication or the SMPTE Link was removed from the USB port.
- Frame Rate
Setup the frame rate that you want to use for either send or receive mode of the SMPTE Link interface.
- Level
The level setting is important for send mode only. You may enter values between 0 and 1 to amplify the SMPTE output signal level.
- Transport Changes if Input Repeats
Some SMPTE sending devices continue sending the last frame instead of stopping the SMPTE transmission.
If this option is not enabled, and the SMPTE devices sends 3x an identical frame, the timeline will continue running until it receives a different frame.
If this option is enabled, the timeline will execute the Stop-Action set up for this sequence.
As written in the tab itself, please note the following when working in a Multi-User environment. When multiple Multi-User Places receive SMPTE Time Code, problems with Sequence playback can result. To avoid this, please make sure that only one Multi-User Place has Sequences with the Time Code Mode set to "Receive" (in the Sequence Inspector).