Loading...
  |
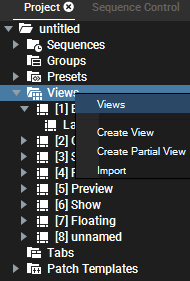
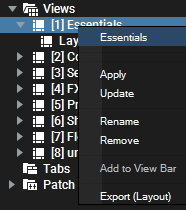
The "Views" entry in the Project tab, the View tab and the View Bar let you recall stored view layouts of the user interface with a single mouse click. This makes it very easy and fast to switch from one view, e.g. focusing on a large Preview window, to another view, e.g. displaying necessary Sequence tabs. The View Bar shows seven views. The first, called "Essentials", is the default view. The others are named "Content, Sequence, FX, Preview, Show, Floating" and emphasize a particular use of the UI. Simply click on a View to change the currently shown tabs and their arrangement. With the "Views" folder from the Project Tree, you can change existing views or create new ones. The chapter "Layout" describes how you can influence the GUI layout: inserting new tabs and panes, breaking panes out, removing and resizing them. To change an existing view, right-click on it and choose "Update". This saves the current layout. When saving a new layout, you can now choose between two options from the right-click menu of the "Views" folder. With "Create View" you save the entire layout as usual (with a small structural change as explained further down). With "Create Partial View" you are saving only a specific part of the interface. A dialog asks which of the four sub-views should be included: When creating a View (via "Create View"), all four sub-views can be found as sub entries in the Project tree. They can be applied, updated or removed separately. The seven new default views change only the "Layout" part, so that the currently loaded Sequence, Preview and Device Tree do not change. You can add a new View to the View Bar to access it faster. You can either drag it there from the Project tab, or right-click it and choose "Add to View Bar" or make a right-click in the View Bar and choose "Add". In the View's right-click menu, you can also find the option to "Export" a view, which saves the "Layout" sub view as a pbv file to the hard disc. Views are saved within the project file. |