Loading...
A Fader can be created to control Pandoras Box device parameters or a sequence opacity, additionally you can retrieve and set its value with nodes and Object and Member Notation.

To create a Fader widget choose "Widgets > Faders > Fader (Vertical or Horizontal)". The mouse cursor changes to a crosshairs icon, indicating the create mode. Each left-click adds the selected widget to the current page. To quit the create mode, you can switch to the run mode with [F8], where you can use all widgets. Most widgets however need to be set up first.
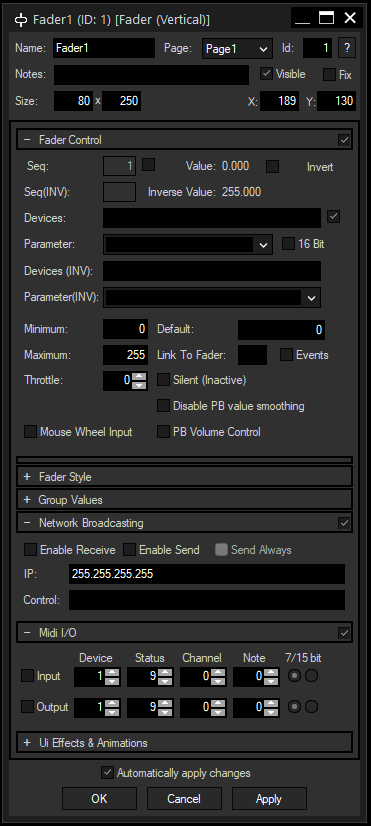
To edit the Fader properties simply right-click it and choose the first menu entry "Fader Properties". Alternatively, you can press [Alt + P] whilst the mouse is hovering above it or switch to the edit / move mode with [F9] and double-click on it. The Fader Property dialog opens up.

A unique name can be entered to identify the widget via the Object and Member Notation. The default name is based on the widget type and ID.
This drop-down offers all available pages to place the widget on.
ID:
The Fader's ID may be changed by entering a new one in the text field top left. If you change it, you will be asked if you also want to adapt the name to the new ID.
A short note can be added here. It is not displayed outside the widget but can be set and retrieved with the WidgetID.Note property member.
Uncheck this box to hide the widget.
Fix:
When the option "Fix" is checked, the Fader will be displayed on every page.
Enter a pixel size for the Fader's size.
Enter the location of the widget (upper left corner) in pixelsFader Control Settings
Seq:
Check this box to directly control the opacity of a Sequence and enter the respective sequence ID.
Seq(INV):
Choose a second sequence to send the inverse value to. This is especially useful if you would like to cross-fade two sequences.
Check this box to invert your value.
Devices:
Check the box on the right to send the Fader value to a Device (layer) parameter. Enter the Site and Device ID of the respective Device, multiple Devices can be entered too, with a white space as separator (e.g.: "2.1 2.2 2.17")
This drop-down offers you all available Device parameters of Pandoras Box. If you want to access an FX parameter, use the FX name and the pipe symbol to specify it (e.g.: "RGB Multiply|Blue"). If the parameter list does not show the desired parameter (in case that you use a custom device) simply type in the name of the parameter here.
The inverse Fader value can also be assigned to device parameters.
16 Bit:
If this checkbox is selected, the fader generates values up to 16 bit. The maximum is automatically set to 65535.
Minimum / Maximum:
Enter here the minimum and maximum value your Fader should have, as well as the Default position of the handle.
Enter here the ID of a second Fader, this Fader should listen to. The actual Fader can be used as it is, but as soon as the linked Fader is moved, the first one will follow.
This feature is especially useful when requiring the same Fader on several pages and using the "Fix" checkbox is not an option.
If two Faders are mutually linked via the Link To Fader option, they can interfere with each other if both are listening to the other's input events. To ensure a smooth movement, uncheck at least one of the Events boxes.
Please note that if a Fader is moved from the remote Fader and the Events box is not checked, no values are transmitted from this Fader to the node system.
Throttle:
The Throttle parameter limits the amount of data transmitted to Pandoras Box. The higher this value is, the fewer times the Device's parameters are updated. Throttling the data can help saving performance, but also reduces smoothness.
Check this box to turn off the parameter value smoothing in Pandoras Box.
Check this box if you temporarily want to mute its output
If you check this box, the Fader will react to your mouse's scroll wheel when hovering over the widget.
PB Volume Control:
If PB Volume Control is activated, this fader is directly connected to a Volume Parameter from Pandoras Box. You can connect to a Layer Volume or the Main Volume of a device.
For this, you have to choose inside the Parameter drop-down.
•Volume: selects in combination with the device, for example 1.1, the Layer Volume of Layer 1.1.
•ASIO Manager: connects to the Main Volume of the device. To select the connected site, you can either enter the site ID (e.g. 1 for the local site) or a layer ID (e.g. 1.1. to connect to site 1 layer 1. This also works great for Audio Track devices.
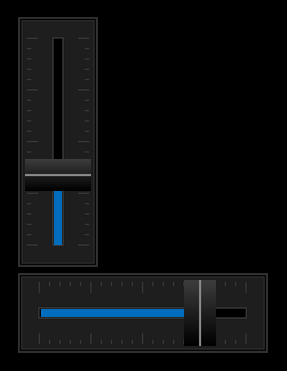
Two images can be assigned to the different parts of the Fader, "Handle" and "Background".
Click on the "..." button to open a file dialog where you can choose your path and image. If you would like to choose an image from the Widget Designer "library", click on the "Res" button. The Resource Manager opens where you can double-click on the image of your choice. You can also save custom images in the Resource Manager to access them faster. The small "x" at the right sets the default image.
With the Orientation parameter, you can set your Fader either vertically or horizontally.
This option is only available for the Unlimited version and offers the possibility to assign a group. Please refer to the chapter Group Values for more information.
The NBS (Network Broadcast Service) allows to transmit and update Faders, Labels and Custom Script Buttons across multiple WD Designers instances on the network. To activate this service, please refer to the Remoting Menu!
Enable Send
To send the faders values as broadcast into the network, you only have to check "Enable Send".
Enable Receive
To receive values from other faders, please check "Enable Receive".
Now you have to specify which item should update your fader:
Enter the IP address of the computer you want to listen to. This could be the local computer (to control the fader through another item on the same Widget Designer) or a different computer in the network. If you do not want to specify the computer but want to listen to all computers in the network, enter "255.255.255.255".
As next step specify the item you want to take the values from. This could e.g. be "Fader1" or "Fader2".
Once all values are set, the fader is ready to be used or edited at any time.
The Fader widget is able to receive Midi Notes and / or send its own value as Midi note velocity. A Midi input / output device has to be connected via the Connection Manager or the Midi Connection Manager.
For sending and receiving Midi, please select which one you would like to do and enter the respective settings:
If you have several connected Midi devices, enter here the ID of a specific device assigned in the Midi Connection Manager.
Specify the values of the note you want to listen to. The values are numeric, so note E4 would be represented by 64. Please note that different translations of Midi notes can exist for different devices, so you might need to add or subtract an octave.
Some systems support 15 bit Midi values instead of 7bit, select the respective radio box here.
The topic Effects & Animations explains how to add and apply CSS based effects and animations.