File Menu |


|
File Menu |
|
File Menu |
|
File Menu |
|
Loading...
This chapter explains the File Menu of the Splitter tool. Please see the introductory chapter for an overview about the Splitter tool.
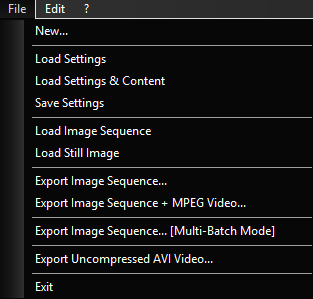
This starts a new project. Please save your project first if you would like to keep it. All Output Regions set up before will be removed in the new project.
This loads the settings from a previously saved Splitter project (.vsp) but does not load the original content (as the next option does).
This loads the settings and the content from a previously saved Splitter project (.vsp). Please make sure that the file name has not changed and the content is still located under the same path which was used before.
This saves your current Splitter project as .vsp file so that you can load the settings (and the content) later.
Choose this option to load an image sequence as your main file in the current project. Next, setup the Output Regions and choose an "Export" option. If you created already some Output Regions, they are applied to the new content and not discarded.
The maximum main file size is 65k x 65k px if using Win8 or above. The following list shows the supported output formats: BMP, GIF, JPG, JP2, J2K, PNG, PSD, TGA, TIF(F), DDS or SNP
Choose this option to load a still image as your main file in the current project. This is helpful, if you have a drawing, e.g. a testpattern showing all planned outputs. If you created already some Output Regions, they are applied to the new content and not discarded.
The maximum main file size is 65k x 65k px if using Win8 or above. The following list shows the supported output formats: BMP, GIF, JPG, JP2, J2K, PNG, PSD, TGA, TIF(F), DDS or SNP
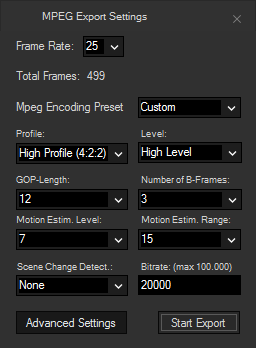
Choose this option to export an image sequence for each Output Region you created before. The image format should be set up beforehand in the Toolbar. A dialog opens where you can browse to an export folder. During the export, a sub folder is created automatically for each Output Region with the same name as in the Splitter, e.g. "Output0". A pop-up window informs you when the export is finished.
|
|
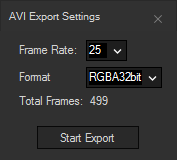 Choose this option to export an uncompressed AVI video file for each Output Region you created before. The video size depends on the image format settings in the Toolbar. A dialog opens where you can browse to an export folder. Later, the AVI videos are saved directly in this folder with the same name as in the Splitter, e.g. "Output0.avi". A pop-up window will inform you when the export is finished. The upcoming "AVI Export Settings" dialog allows you to set the frame rate (24, 25, 30, 50 or 60 fps) and the format (RGBA32bit, RGB24bit, RGB555,RGB565,YUY2,UYVY or IYUV). It also displays the total amount of input frames. |
This closes the Splitter tool. Save your project first if necessary.
The next chapters describes the Edit Menu, the Toolbar and main Window. The Splitter Workflow is summarized on the last page of this chapter.