This chapter describes a possible workflow when using the Splitter. Please see the introductory chapter for an overview about the Splitter tool.
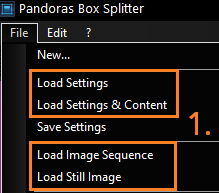
1. Loading the Main File
Load an Image/ Image Sequence or an existing Splitter Project (.vsp) using the File Menu. |
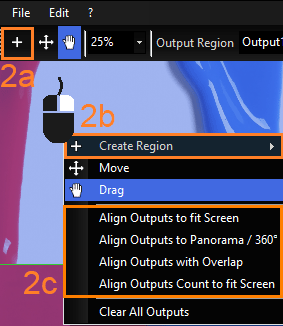
2. Creating Output Regions
Create as many Output Regions as you need:
a) using the "Create Region" function in the Toolbar... b) using the "Create Region" function from the right-click menu inside the Main Window
b) using the "Align" functions from the right-click menu inside the Main Window which can also be found in the Edit menu
|
3. Adjusting Output Regions
|
If any Output Regions need to be adjusted in their position and/or size, you have two choices. Moving the Output Regions with the mouse (using the "Move"-option from the toolbar) is the fast but unprecise option. To do an exact modification, select the Output Region (by name in the Toolbar or by clicking on it when being in Move-Mode) and enter the Pixel values of the top left corner in the "X Pos" and "Y Pos" fields and/or the "Width" and "Height" fields.
|
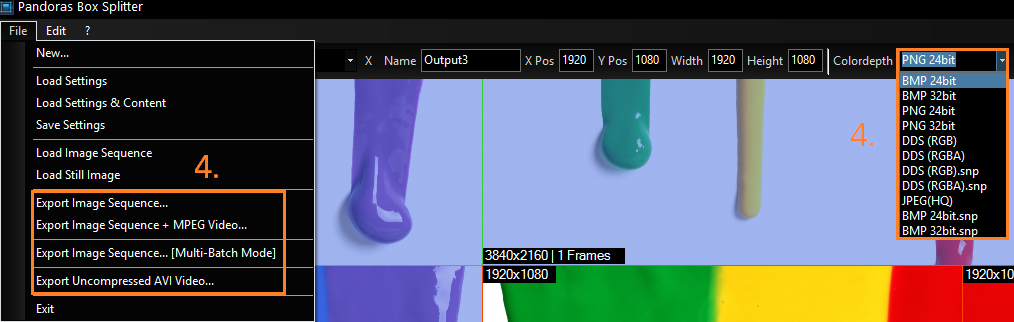
4. Exporting the split files
|
When the setup for the Output Regions is done you may export the separate split files now as image sequences or as video files using the File Menu. When exporting an Image Sequence choose the Image Sequence format in the Toolbar first (more info about formats).
|
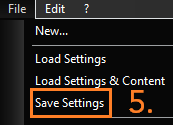
5. Saving the current project
If you want to modify the Output Regions sometime later, it a good idea to save the project via the File Menu > Save Settings. |