Loading...
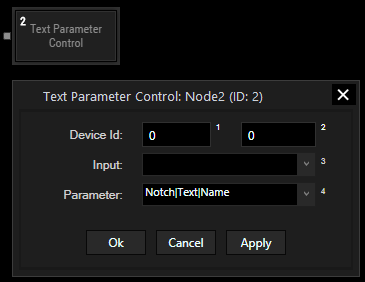
The Text Parameter Control node allows controlling one selectable parameter of a Pandoras Box Device that contains text. For the time being, text parameters can only be found on Notch Layers.
In addition to the node you can also use the scripting language to change text parameters in PB, e.g. via the command DeviceSetTextParam.
This node can be found under Nodes > Output > Pandoras Box > Text Parameter Control

Device ID:
Enter the Device ID, e.g. 1 in the first text field and 2 in the second text field. This will control Layer 2 of Site 1.
Input:
Choose the input source from the list that should provide the string values.
Parameter:
Choose the parameter you want to control from the list.
For controlling a Notch parameter, write the full parameter name as it appears in PB. The groups are shown in the Device Control tab but also in the Device Tree when unfolding entries. The Device Tree is helpful too, if a name is too long to be displayed in the Device Controls tab.
The name is case-sensitive, all spaces count and the hierarchy needs to be represented using the pipe "|" character, e.g. Notch|Text|Param Name
With Widget Designer version 6, all nodes support so called node commands. Node commands access functions (i.e methods) from a node and / or set a parameter (i.e. property).
Enter "node", followed by the according ID and a dot and a list will pop up showing all available commands for the node. For instance, Node1.TintColor.SetRGB(125,0,255), colors the node in purple.
In addition, the node properties with a parameter ID (the small superscript number) can be edited via the command Node1.SetParam(ID,new Value) or WDNodeSetParam(NodeID,ParamID,Value).