Loading...
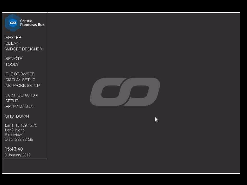
The VNC Panel control lets establish a VNC session to a remote computer and have full remote access.
It is also possible to host multiple VNC sessions within one page of the interface.
Please bear in mind that transmitting a desktop stream uses up resources in your network and can lead to a high amount of traffic, especially when several sessions are open at the same time!
A VNC server, e.g. the PB Menu, needs to be running on the remote PC.
If you want to remote into different remote computers, you can set up button scripts to automatically change the IP address and connect to different places.


To create a VNC Panel widget choose "Widgets > Panels > VNC Panel". The mouse cursor changes to a crosshairs icon, indicating the create mode. Each left-click adds the selected widget to the current page. To quit the create mode, you can switch to the run mode with [F8], where you can use all widgets. Most widgets however need to be set up first.
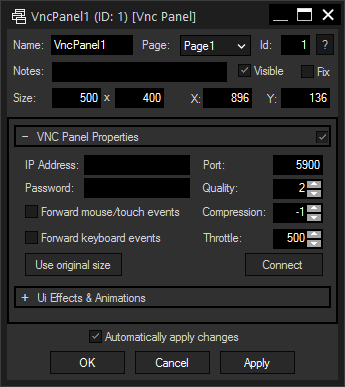
To edit the VNC Panel properties simply right-click it and choose the first menu entry "VncPanel Properties". Alternatively, you can press [Alt + P] whilst the mouse is hovering above it or switch to the edit / move mode with [F9] and double-click on it. The VNC Panel property dialog opens up.

A unique name can be entered to identify the widget via the Object and Member Notation. The default name is based on the widget type and ID.
This drop-down offers all available pages to place the widget on.
ID:
The VNC Panel's ID may be changed by entering a new one in the text field top left. If you change it, you will be asked if you also want to adapt the name to the new ID.
A short note can be added here. It is not displayed outside the widget but can be set and retrieved with the WidgetID.Note property member.
Uncheck this box to hide the widget.
Fix:
When the option "Fix" is checked, the VNC Panel will be displayed on every page.
Enter a pixel size for the VNC Panel's size.
Enter the location of the widget (upper left corner) in pixels
IP Address:
Enter here the IP address of the remote PC to be accessed via VNC.
Port:
Enter the port for your VNC connection if it deviates from the standard port 5900.
Password:
If your VNC server requires a password for allowing a connection, you can enter it here.
Quality:
The higher this value (min 0, max 9), the higher the quality of the desktop stream.
A higher quality results in higher network traffic!
Forward mouse/touch events:
Check this box if you want to be able to perform mouse events on the remote computer.
Forward keyboard events:
Check this box if you require keyboard data to be sent from your local to the remote computer.
Throttle (ms):
To save network resources, it is recommended to throttle the stream to limit the transmitted frame rate. Keep this value as high as possible unless you need a more fluid stream.
Use original size:
Press this button to apply the size of the desktop stream to the VNC Panel and view the remote computer with its native resolution.
Connect / Disconnect:
Press this button to start or stop the VNC session. This action can also be performed from a script, like e.g. VncPanel1.Connect and VncPanel1.Disconnect.
The topic Effects & Animations explains how to add and apply CSS based effects and animations.