Loading...
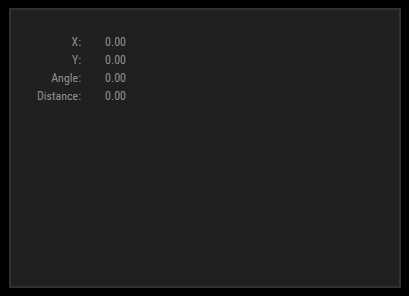
The XY Panel represents a graphical touch pad with relative or absolute value controls. It can either be used to directly link Pandoras Box Device parameters to the generated position data, or for retrieving position values for further processing.
If the Mouse Over Mode is not selected, position data is only sent upon a mouse left-click.

To create a XY Panel widget choose "Widgets > Panels > XYPanel". The mouse cursor changes to a crosshairs icon, indicating the create mode. Each left-click adds the selected widget to the current page. To quit the create mode, you can switch to the run mode with [F8], where you can use all widgets. Most widgets however need to be set up first.
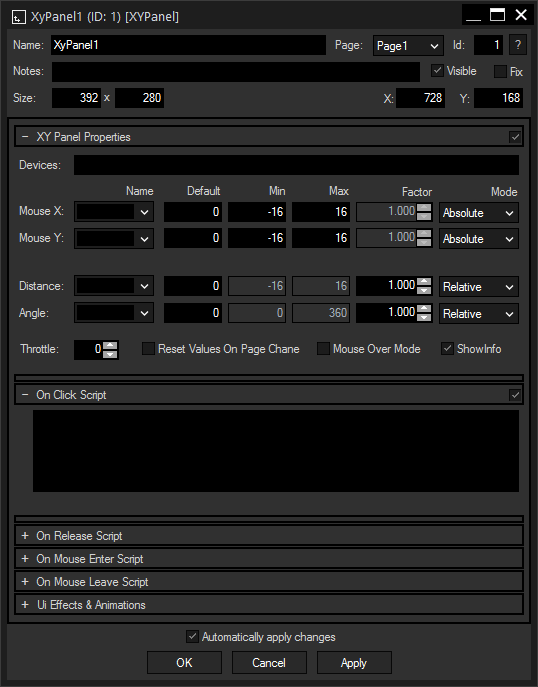
To edit the XY Panel properties simply right-click it and choose the first menu entry "XyPanel Properties". Alternatively, you can press [Alt + P] whilst the mouse is hovering above it or switch to the edit / move mode with [F9] and double-click on it. The XY Panel property dialog opens up.

A unique name can be entered to identify the widget via the Object and Member Notation. The default name is based on the widget type and ID.
This drop-down offers all available pages to place the widget on.
ID:
The XY Panel's ID may be changed by entering a new one in the text field top left. If you change it, you will be asked if you also want to adapt the name to the new ID.
A short note can be added here. It is not displayed outside the widget but can be set and retrieved with the WidgetID.Note property member.
Uncheck this box to hide the widget.
Fix:
When the option "Fix" is checked, the XY Panel will be displayed on every page.
Enter a pixel size for the XY Panel's size.
Enter the location of the widget (upper left corner) in pixels
Devices:
Enter the Site and Device ID of the Device that shall be controlled by the XY Panel. Multiple Devices can be entered too, with a white space as separator (e.g.: "2.1 2.2 2.17")
Mouse X / Mouse Y:
The following properties are applied for the X as well as for the Y coordinate of the mouse within the XY Panel.
Distance / Angle:
If you are using an external multi-touch device such as an AirScan for controlling the XY Panel, distance and angle of two active points can be used for interacting with Pandoras Box, too.
Name:
Select the Pandoras Box Device parameter to be controlled by the XY Panel from the drop-down.
Default:
Enter here a default value to which the XY Panel shall be reset. A reset can be triggered e.g. via the command XYPanel1.ResetDefault.
Min / Max:
These are the values referring to the absolute minimum and maximum values the XY Panel can produce. The default direction for the X coordinate is from left to right and for the Y coordinate from top to bottom. The direction can be reversed by switching the Min and Max values.
This setting is only available for the Absolute mode (see below).
Factor:
Apply a factor to affect the strength of the value increment based on the mouse input motion when you are using Relative mode.
Mode:
Select the Absolute mode from the drop-down if you want your Pandoras Box Device to directly correspond to the absolute values delivered from the XY Panel.
Select the Relative mode if you want to add the XY Panel values to the current Pandoras Box Device values.
Throttle (ms):
Sliding movements on the XY Panel creates a high amount of values being transmitted to Pandoras Box. To reduce the amount, e.g. if you experience a delay or jitter in the PB response, you can set up a throttle that limits the value output to a certain interval.
Reset Values On Page Change:
The entered Default values are sent on page enter when this option is checked.
Mouse Over Mode:
Check this box if you want the XY Panel to mouse over events instead of just reacting upon left-click.
Show Info:
Uncheck this box if you do not want the position data to be displayed on the widget.
The topic Effects & Animations explains how to add and apply CSS based effects and animations.
In the Script section you may enter commands to be executed. You can type directly in the text field, the Script Assistant will help you finding the expression you search for. The topic Script Language explains this in more detail.
The scripts for Press, Release, Mouse Enter and Mouse Leave are executed when the Widget Designer button is being used, on the local interface as well as on any web client.
You can enter as much text in one of the scripting fields as you like. For sophisticated scripts, Macros and Functions allow you to keep a good overview.
If you are interested in the Web Server feature and some small examples, please read the topics Web Server and Object and Member Notation .
See here a list of all commands.
"On Click" is processed when a mouse left button down click on the panel control is being performed by the user.
"On Release" is processed when a mouse left button up click on the panel control is being performed by the user.
"On Mouse Enter" is processed when the mouse cursor enters the panel control.
"On Mouse Leave" is processed when the mouse cursor leaves the panel control.