Loading...
This chapter explains the 2D Mesh Editing Mode of the Preview which allows you to warp directly in the Pandoras Box user interface. For more topics related to Mesh editing or explanation about the GUI please refer to Mesh editing mode.
To start 2D Mesh editing, follow the steps below:
1.Right-click in the Project tab and select "Add Editable Mesh" and save it.
2.To create a more descriptive name, right-click the mesh and select "Rename".
3.Check the size in the Sub Mesh Inspector.
Note: The newly created Editable Mesh folder lists one Sub Mesh called "Surface" which is a planar 2D Mesh in full screen size with a 3x3 FFD grid.
4.Assign the Editable Mesh or the contained Sub Mesh called "Surface" to your Layer.
5.Toggle the Preview to the 2D Mesh Editing mode.
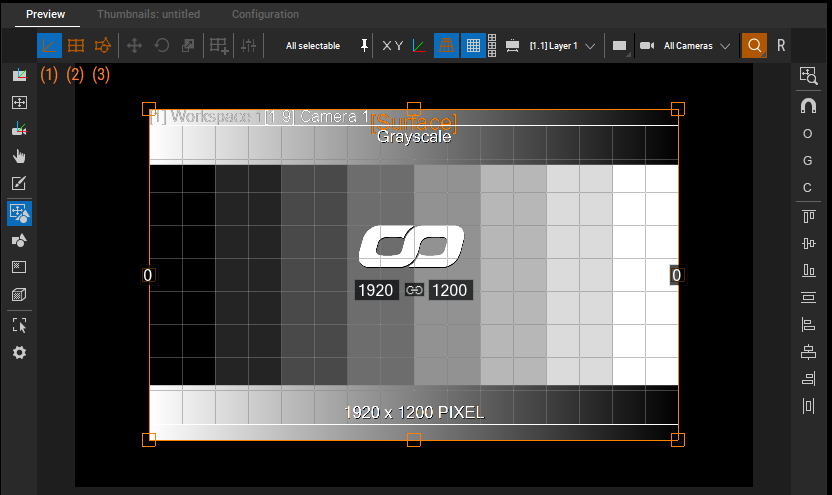
As soon as the Preview is set to the 2D Mesh Editing Mode, the "Transform Sub Meshes" mode (1 in image below) is activated. Like the Mesh Editing Mode, there is also "FFD Modifier" mode (2 in image below) and "Vertex Modifier" mode (3 in image below).

Learn more about the three modes available:
Transform Sub Meshes—enable Transform Sub Meshes to manipulate the surface. This is the first step in 2D Mesh Editing mode.
FFD Modifier—enable FFD Modifier to warp the surface.
Vertex Modifier—enable Vertex Modifier to warp the mesh in a more precise manner.