Loading...
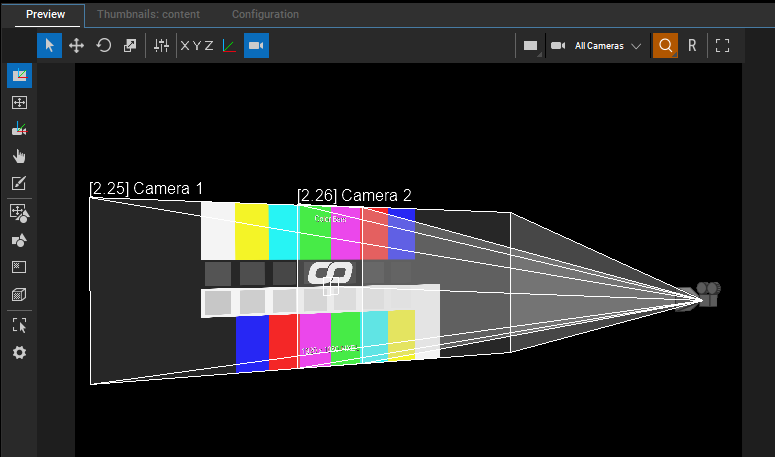
The Preview tab in Pandoras Box renders your programming. Further, you may edit Layers, Cameras, Meshes etc. directly in the Preview.
With version 6 we introduced new powerful features and enhanced the structure of the Preview by adding buttons and drop-down lists around the main window. They call....
Modes: These buttons are fixed, each mode is covered in the linked chapters.
Tools: These buttons vary because they depend on the chosen mode.
Views: These options are fixed and influence what the Preview displays, e.g. multiple view ports with Camera and Output views.
Modes |
Tools |
View |
|
 |
|
|
||
 |
Per default, the Preview tab is part of the main user interface. However, you can also choose to work in a maximized Preview. The according bottom left button or the shortcut [Ctrl + Shift + F] toggle your Preview tab to a fullscreen window. All tools, modes and view options are available within the Button Bar (shortcut [T] to show and hide it). In addition you can navigate and use the mouse cursor as usual. Each Manager offers this feature. |
 |
If the Manager has Output devices listed in the Device Tree, it offers an additional function as their Preview is also their Render Output. As this is not the editable Preview anymore, there is no Button Bar etc. and you cannot switch views. Use the according top right button or the shortcut [Ctrl + F] to toggle to fullscreen. |
 |
In case you work with multiple displays, you can choose your display adapter within the Configuration tab > Local Preview (also accessible through the settings button ). More Preview settings can be found under Configuration > Preview Display. |
Note that the Preview window is protected with a watermark. It only appears in the Preview, never in the Output!
If working with Art-Net LED walls, you can toggle the patch on and off with the "Select Matrix Mask" command from the Previews context menu.
First, the Preview of the Manager renders the content from all Clients in full quality. To render efficiently, you can decide which Client(s) are included in the Preview. The next chapter explains how to toggle a Client's Preview on and off. This is of interest in case you work with many Clients and / or content with high resolution, frame rate,etc..
Second, in case you work in a Manager-Client setup, content needs to be copied to all hard drives. If the Manager is missing the content, its Preview cannot render it. If the Client is missing the content, its output cannot render it even though the Preview shows it. The Preview does not provide a real-time feedback of the Client's outputs!
Third, the Preview allows you to pre-program a show without having Clients connected (yet).
The next chapters:
- let you know how to include Sites into the Preview
- explain the different Camera or Output views
- describe how to zoom, pan and rotate the Preview
- explain what wireframes and pivot handles are for
- inform how you can use the and Preview as an interactive interface with pivot handles (Layer Mode and Camera Mode) and Layer Picking (Picking Mode)
- cover the advanced Preview Modes: Canvas Editing Mode for drawing and masking, Mesh Editing Mode for warping and last, Planar and Perspective UV Mapping Mode for texturing
- describe the context menu from the Preview