Loading...
 If you would like to draw in your Preview, please create a Canvas Asset first. To do so, right-click in the Project tab and choose "Add Canvas", save the new Canvas and assign it to a Layer. In case you would like to use the Canvas as a mask, make sure to assign it to a Layer overlaying all other Layers, e.g.: |
 In case you need to change the Canvas size, please go to the Canvas Inspector. |
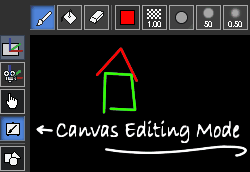
To draw on the Canvas, go to the Canvas Editing Mode and make sure that the Editing Context (highlighted above in orange) is set to the Layer your Canvas is assigned to. Now you can pick the Brush or Flood tool and draw on the Layer. There are various other tools that let you choose the color or brush softness for example. With the Erase tool you can turn pixels transparent again.
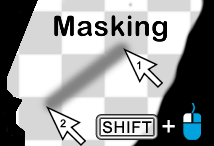
To draw a straight line click once with the brush tip and hold the [Shift] key when clicking the second time.
The Drawing Canvas can also be used for a more creative application, e.g. to draw onto a facade or other 3D object. As for most interactive applications, the Widget Designer is of great help. Please see the chapter about the "Layer UV Draw to Canvas" node.
 Note that in the Device Tree, the Layer that is picked as the Editing Context is marked with the Editing Context icon.
  In case you delete the Canvas from the Layer whilst the Editing Context is still referring to it, the Layer will be marked with a small red dot.
To export the mask as a PNG file, right-click on the Canvas and choose "Export".
The next chapter explains the Mesh Editing Mode.