Loading...

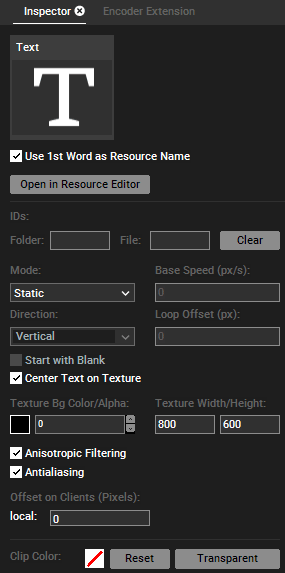
Use 1st Word as Resource Name
This names the Text input in the Project tab with the first word entered in the Text Input Editor.
Open in Resource Editor
In the Text Input Editor you may set up all options regarding the content of the selected Text Input, e.g. the text itself. Some of the options from the Editor are available in the Text Inspector too and apply to all (multi-) selected Text Inputs. The Editor also allows to transfer style properties to other Text Inputs. Please note, that .net framework 4.0 is needed to display this tab.
Folder and File ID
See the File Inspector.
Mode /.../ Texture Width/Height
Please see the Text Input Editor for all options from "Mode" to "Texture Width/Height".
Offset on Clients
Enter a pixel value to offset the Text Input for the according Client. This is especially useful when rendering text that spans across multiple outputs from different Clients.
Please see the File Inspector for "Anisotropic Filtering", "Antialiasing" and "Clip Color".