Loading...
The FireFly™ particle system allows creating elaborate real-time particle effects in a true interactive 3D compositing space. There are 3D and 2D particle systems available on Pandoras Box.
 For the depicted example, a gradient image was stretched and rotates slowly around itself. Simple parameter choices allow creative content creation and adding of visual effects on the fly, not only for interactive solutions. |
 |
 |
 Since version 8, Particles are rendered based on the blend mode of the Layer. In prior versions, they were mixed with the background as if their blend mode was "Add". With the ability to choose a distinct blend mode, you can now also use particles darker than the background or create other effects. |
The easiest way using particles, is to add a "Particle System Layer". Simply right-click a Site and choose "Add Devices". This layer is optimized and offers only parameters mostly needed for particles.

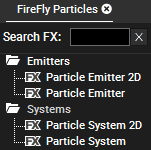
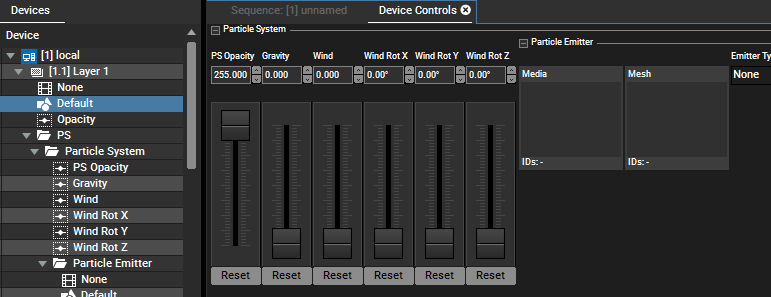
 First, open the Particles tab: Open the Tabs menu and click on "FireFly Particles". Open the "Systems" folder and drag a 2D or 3D Particle System onto a Video layer in the Device Tree. Alternatively, select the Layer to see its parameters in the Devices Controls tab and drag the Particle System on the empty space right next to the last parameter. With the particle system you define the environment, setting up the opacity of the system, Gravity and Wind. To see how these settings affect the emitters, you have to add at least one emitter. Next, open the "Emitters" folder and drag a 2D or 3D Particle Emitter onto the Particle System (not the layer), either in the Device Controls tab or in the Device Tree on the entry "Particle System" under "PS". The particle system section is now enhanced by the emitter parameters.  |
Of course, you can also control the parameters of Particles using the SDK or Widget Designer, e.g. through interactive devices like the AirScan or sensors like Phidgets and more. In general, the exact parameter name is needed for remote controlling. The name is case-sensitive and all spaces count. The parameter list shows all parameter names of a Particle Layer and their value ranges. For instance, to control the "Opacity" or "Gravity" simply type this name as it is. For all parameters in the Emitter group, e.g. "Radius", the parameter name starts with "Particle Emitter" and the pipe "|" character, e.g. Particle Emitter|Radius If you are using the old workflow with adding a Particle System and an Emitter to a Video Layer, the names are in most cases identical, but with an additional "Particle System|" in front of it, e.g. "Particle System| PS Opacity" or "Particle System| Gravity" or "Particle System|Particle Emitter|Radius". Note that all position values are displayed in Pandoras Box in pixels but the input via the SDK has a different range per default. The chapter Configuration tab > Unit Management explains more about this and the check box "Interpret Automation Param Input as Pixel Values". As you see below, there are some "life time" parameter like "Speed" or "Color"; those ones can only be remote controlled via the SDK not Widget Designer. |
System / Forces |
Description |
PS Opacity |
Opacity of the whole Particle System |
Gravity |
Amount of Gravity affecting the emitters (see Mass and Drag parameters) |
Wind and |
Amount and Rotation of Wind affecting the emitters (see Mass and Drag parameters) |
Emitter |
Description |
Media and Mesh |
Media and (3D) object file used for emitting particles |
Emitter Type |
Choose how the emitting particles appear: |
Particle Alignment |
Alignment of the emitting particles: |
Radius |
First size parameter for all "Emitter Types" except "Point" (in units, a PB fullscreen is always 16 units wide) |
Length |
Second size parameter for all "Emitter Types" except "Point" and "Line" |
Angle |
Opening angle of particle source |
Range |
Range of applied "Speed" |
X / Y / Z Pos |
Position of "Emitter Type" |
X / Y / Z Angle |
Rotation of "Emitter Type" |
Rot Pivot |
Position of rotation pivot |
Count/Sec |
Amount of particles emitted per second |
Time to Live (Sec) |
Amount of seconds a particle will live until it disappears (= lifetime) |
Speed * |
Speed of particles (lifetime depending) |
X / Y / Z Scale * |
Size of particles (lifetime depending) |
X / Y / Z Rot * |
Rotation of particles (lifetime depending) |
Mass |
Mass of particles; |
Drag |
Drag of particles; |
Color * |
Color added to particles (lifetime depending) |
Particle Opacity * |
Opacity of particles (lifetime depending) |
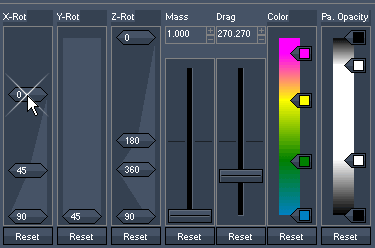
* : These parameters allow defining a curve over the particles lifetime. A right-click into the fader's background adds a new point in time and with a double-click the value can be defined.  |
|