Loading...
The section "Unit Management" in the Global category from the Configuration tab enables you to set up on which units Pandoras Box 3D space is based on. Since version 6, the pixel-oriented workflow is the new default and supersedes working with generic units. Of course, you can still choose between both workflows. When you create a new project, the Startup Dialog offers the check box "Pixel-oriented workflow" which does the same as using the Configuration settings described below.
Pandoras Box allows you to work in a 3D space based on so called 3D units or generic units (GU).
The result you see on your display is a rendering of the 3D space done in two steps, so called render passes. First a 3D compositing and then a 3D output space is created. The chapter "Video Processing Pipeline" describes the Composition and Output Pass in more detail.
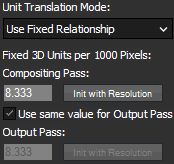
The final render output is based on pixel units. Depending on the resolution set up in the Display driver, the pixel width and height changes. Now, there are different ways how to translate a 3D unit to a pixel and Pandoras Box offers two options in the drop-down list "Unit Translation Mode".

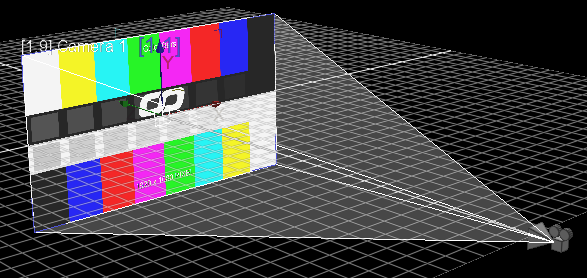
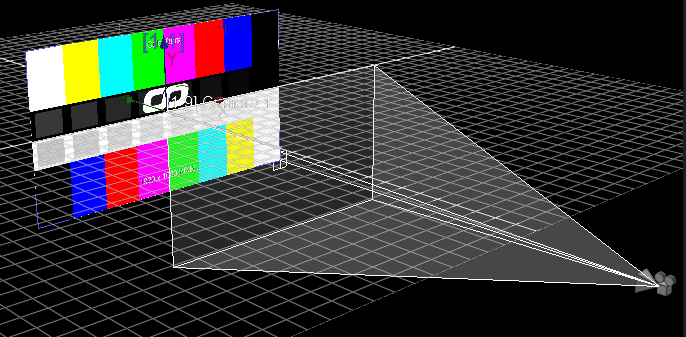
When choosing the option "Map 16 3D Units to each Resolution", Pandoras Box sizes the 3D spaces so that 16 3D units exactly match the pixel width of each render pass. This is achieved by applying specific parameters to the camera; the XYZ-position equals 0,0,-25 and the opening angle, the field of view, is 35.489°.
To give you an example, no matter whether your display / render pass resolution is 1024px or 1920px, moving a layer with 8 units has the same result in both displays. If the layer's center was in the middle of the screen, it will now be at the monitor's edge.
In other words, different render passes may map same 3D unit distances to different pixel distances. In the example, 16 units were mapped to the 1024px as well as the 1920px output, hence 8 units is half the width of both monitors.
16units / 1024px = 0.15625 units / px = 15.625 units / 1000 px
16units / 1920px = 0.83333 units / px = 8.333 units / 1000 px
"Origin Settings" are further options that become available when working with a fixed relationship. Layers and other devices (Camera, Output) can be positioned differently in regards to the origin of the coordinate system.
  This is the default in Unit Translation Mode. |
  |

In Pandoras Box, the positive X-axis points to the right direction and the Y-axis to the top. If you prefer to have the Y-axis pointing down, make sure, "Invert Y-Axis" is enabled. Both options can also be found in the section "Devices / Parameters" where you can also choose to see percentage values.
The last option "Interpret Automation Param Input as Pixel Values" is of interest when you remote control Pandoras Box via the offered SDK or via Widget Designer. When you send values with the type Double to "pixel" parameters in PB, they can be interpreted directly as pixel values when the check box is activated, meaning that they are not modified (again). When the option is deactivated, PB assumes, the input values are generic units and translates them to pixels according to the translation factor. For example, sending "4.5" results in 540px taking the default translation factor 8.333 GU per 1000px.

"Set All Layer Sizing Modes To 'Media Pixel Size' " changes the Sizing Mode from a Layer. Please see further information in the Layer Inspector.
"Reset All Cameras" resets all (active) parameters from the Camera Layer. As explained above, the translation modes set different default parameters for the cameras. In case you have already changed some parameters, please click this button (and adopt your programming).
"Reset All Layer Z-positions" resets all (active) Z-position parameters from all Video Layers. If you work with "Fixed Relationship" and the pixel-oriented workflow the pixel accuracy is only achieved when leaving the layers on Z-position 0.
All these options are already prepared for you in case you open a new project and click the check-box "Pixel-Oriented Workflow" in the Startup Dialog.
If you change to a generic unit-based workflow, there is only one button changing the Sizing Mode from a Layer (explained here: Layer Inspector): "Set All Layer Sizing Modes To 'Fit Larger Side' ".