Loading...

The "Mesh" tab allows to setup more mesh segments and to influence the UV texture map applied automatically to it. Please note that changes can only be applied to original meshes, not to imported objects.
Enter the amount of horizontal and vertical segments you want to use in your mesh. For more details, there is a tutorial at the end of the Warper chapter.
Important:
Adjust the amount of mesh segments BEFORE you modify the mesh, because this will reset any changes you did to the mesh before! There is no [Ctrl + Z] function. Nevertheless you may modify the mesh count as long as you are working with the FFD only.
These settings influence the UV texture map and can also be adjusted using the Texture tools from the tools bar. Please activate the Textured Mode first to see the changes done here.
ZOOM and ASPECT
Use the zoom option (or the Texture Tool ![]() from the Tools Bar) to zoom into the selected texture. The zoom values range from 1 to 99. The texture is enlarged while retaining the aspect ratio given by the mesh size.
from the Tools Bar) to zoom into the selected texture. The zoom values range from 1 to 99. The texture is enlarged while retaining the aspect ratio given by the mesh size.
A change in the aspect ratio, influences the texture's height only. The aspect values range from 0 to 99999999.
Press ![]() to reset the value for the zoom and the aspect ratio to the default value 1.
to reset the value for the zoom and the aspect ratio to the default value 1.
X and Y OFFSET
The X- and Y-Offset (or the Texture Tool ![]() from the Tools Bar) enable you to move the displayed texture in both X and Y position. The possible values range from -1 to 1, whereas 0.5 would mean for example that the texture is moved half the way to the right and upwards.
from the Tools Bar) enable you to move the displayed texture in both X and Y position. The possible values range from -1 to 1, whereas 0.5 would mean for example that the texture is moved half the way to the right and upwards.
Press ![]() to reset the X- and Y-Offset to the default value 0. Please note that the Z-Position will be set to default as well!
to reset the X- and Y-Offset to the default value 0. Please note that the Z-Position will be set to default as well!
The Z position does not influence the UV map but the position from the mesh / object. According to the coordinate system, positive Z values move the object backwards whilst negative values move it forwards. To change the Z position is especially important when objects overlap each other.
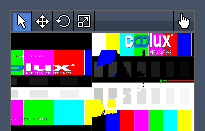
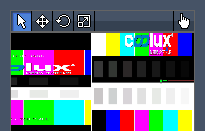
As seen in the example below, overlapping meshes with same Z-Order values will result in Z position fighting when the objects (exported as one object) are used in Pandoras Box. As this issue also depends on the camera position, it can happen that you see a Z fighting problem only under certain circumstances and maybe not in the Warper itself but with in the exported file in another program.
To export positions that can be clearly assigned, you have to define an unambiguous Z-Order (for the overlapping meshes).
 |
 As long as the Z-Order for none of the meshes is modified, the selected mesh will always be displayed in front of the not-selected one |
 |
 |
 |