Picking Mode |


|
Picking Mode |
|
Picking Mode |
|
Picking Mode |
|
Loading...
Layer Picking "captures" the position from the mouse pointer and if the mouse is moved in your Manager's Preview tab or the Client's fullscreen window the feature recognizes what layer is touched and where exactly on the layer the mouse is located. A layer can now be used as a true interface as mouse clicks can be passed through.
The term "mouse pointer" actually does not only refer to a mouse device but to any device that is recognized by the operating system as a pointing device and can send these input events. This includes for example an AirScan or a touch screen if they are set up to do "clicks". If you are working with an Windows XP system only one input event can be sent, whereas Windows 7 (and above) is able to work with multi-touch events.
The input events can be sent from a local pointing device. Let's say for example you have a Client that renders layers in full screen that should be clicked with an AirScan. Connect the AirScan directly to the Client to receive local input events. Another possibility is to connect the AirScan to another computer which sends the input events to the Client through a so called "Mouse Injection". A Mouse Injection node can be found in the Widget Designer.
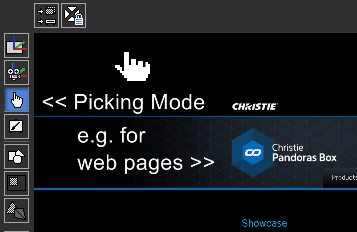
If you would like to click in the rendered Preview tab on your Manager, simply toggle the Preview to the  "Picking Mode".
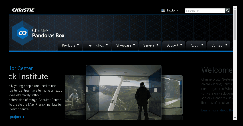
Please follow these steps to use Layer Picking with a input device connected to a Client that is toggled to fullscreen and shows a web page for example.
 Then assign the Browser to a Layer from the Client. Of course you can work with a Client connected or not connected yet. (Please do not change the default render pass, i.e. leave it assigned to the composition pass.) |
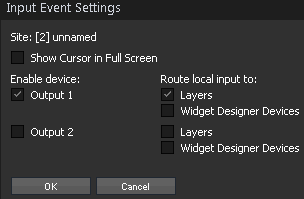
  a) Select the Client in the Device Tree tab and in its Inspector click the according button . b) Toggle the Preview to the Picking Mode, and open the  "Show Input Event Settings". This opens a dialog that shows the settings for all systems in the Device Tree. "Show Input Event Settings". This opens a dialog that shows the settings for all systems in the Device Tree. |
 Now, the mouse capturing works |
 In the Manager's Preview you will see a special click cursor. |
  a) in the Preview tab if you are in the Picking Mode and toggled to the according Output View b) in the Client's small render window c) in the Client's fullscreen render window Optional: Create a Pointer Layer, if you would like to. Right-click the Client in the Device Tree and choose "Add Device" > "Pointer". |
 "Always Show Cursor" button. "Always Show Cursor" button. |
In addition to the Preview or Fullscreen interaction, you can also route the data to Widget Designer Device, to execute actions there too. It is also possible to know where the mouse is located e.g. on-top of Layer 1 and work with this data.
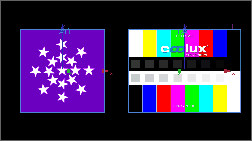 In Pandoras Box, create a new project and program layer 1 and 2 next to each other so that your Preview looks something like the example to the left. Please do not change the default render pass, i.e. leave it assigned to the composition pass. |
a) Select the Client in the Device Tree tab and in its Inspector click the according button . b) Toggle the Preview to the Picking Mode, and open the "Show Input Event Settings". This opens a dialog that shows the settings for all systems in the Device Tree. |
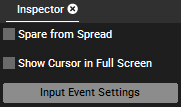
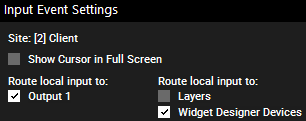 The check box "Show Cursor in Fullscreen" (in the Device Inspector or in the dialog) lets you display the mouse cursor on-top of the Client's fullscreen. |
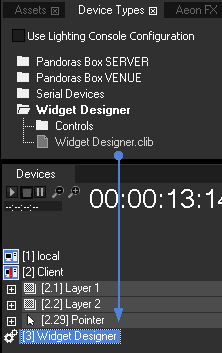 Currently, the device cannot connect and is depicted with a red mark. Select the Widget Designer device in the Device tab to see its Inspector. Enter the IP address from the Widget Designer and the icon will not display the red mark anymore. If it still does, check the IP address and domain number from PB (in the Configuration tab) and from WD as described in the next step. |
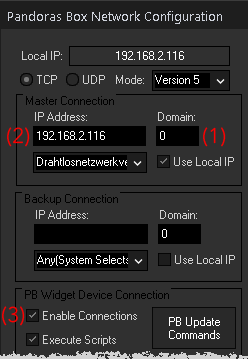 Have a look in the section "PB Widget Device Connection" and enable the check box "Enable Connections" (3). You can close the dialog, but remember the button "Input Tester", it opens a dialog that displays incoming information. |
 |
Please note, that the data is only transferred when the mouse is actually moved. |
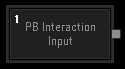
 The node reports the Site ID and Device ID as soon as the mouse touches a layer. Of course its opacity value must be greater than zero. X and Y relate to the width and height from the Preview tab or fullscreen window and are measured in pixels.
|
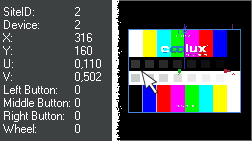 The mouse buttons (value 0 or 1) and the wheel (value depending on mouse) report whether the according button was pressed or the wheel was used. The left image shows the reported data in Widget Designer: the mouse touches layer 2 from Server 2 and hovers above its UV-coordinate (0.1,0.5) whilst the XY-coordinate in the Preview tab is (316,160) pixel. If you would like to use the data to click on Widget Designer's Custom Script Buttons, please see its chapter. You can also use further filter nodes, e.g. the "Is in Bounding Box node" to check whether the pointer is in a certain area. |
The next chapter explains the Canvas Editing Mode.