Loading...
The Layer Inspector allows you to set up the following:
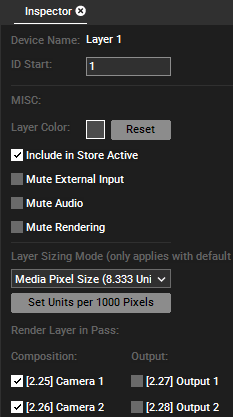
Layer Color
Per default each layer in the Sequence tab is displayed in gray. Clicking into the gray field opens a color dialog where you can choose a different color. Note that you can also color a container.
Include in Store Active
Uncheck this option to exclude the layer from all Store Active commands.
Mute External Input
Tick this check box to block this layer from any external input, like Art-Net, Input Data from Widget Designer etc.
Mute Audio
Tick this check box to mute the audio content of the Layer. Note that the Mute icon in the Device Parameters tab is automatically clicked. Also, the according icon in the Device Tree changes automatically.
Mute Rendering
Tick this check box to mute the audio content and stop rendering the video content of the Layer. Note that the Mute icon in the Device Parameters tab is automatically clicked. Also, the according icon in the Device Tree changes automatically. "Muted" Layers are not part of the rendering process anymore. If you simply set the opacity for a Layer to 0, it is part of the rendering but just not visible.
Layer Sizing Mode
Choose from the drop-down list how this layer should handle the aspect ratio of all media files assigned to it. See below for examples and a detailed explanation.
Notes
Notes can also be saved in this location. For more details, see Notes in chapter File Inspector.
Render Layer in Pass
The check boxes allow to toggle the Layer's visibility in the available Composition and Output Devices. Per default, the layer is included in the composition pass as it is visible for all available Cameras - it will be part of the so called render target and then be send through the entire output pass. It will be affected by its settings e.g. warp object, keystone or softedge etc.
If you change the default behavior, e.g. uncheck the Camera option(s) and check the Output option(s), the layer is only part of the output pass. It will not be seen by the Camera as it is sent directly to the according Output. In return it will not be affected by the output settings (except perspective settings) and can be placed outside the warped / softedged area. This is especially interesting when working with multi-softedged projection(s) and blacklevel compensation is needed. Find more information in the topic Video Processing Pipeline.
The check boxes depend on the number of Cameras / Outputs. A Server with two Outputs, for example, always has two Cameras too and you may decide whether a layer should be only rendered by one of them. A possible application is working with different outputs for a key & fill scenario.
By default the Layer Aspect Ratio is set to "Media Pixel Size" meaning that each media file is displayed with its native aspect ratio and size. In other words, it is not stretched nor scaled. Note the "Media Pixel Size" is a dynamic mode that depends on the translation factor set up in the Configuration tab > Unit Management. For example, if you have an output with a width resolution of 1920px (and a height resolution of 1080px) the according translation factor is 8.333. Now, the Layer Sizing Mode is based on 8.333 as well. If a 1920x1080px testpattern is assigned to a Layer, it will be displayed fullscreen. A 1024x768px texture will be displayed accordingly smaller. In case the Layers of a second Client with a 1024x768px output are set to "Media Pixel Size" as well, the same texture is fullscreen whilst the first testpattern would be cut off.
From the other modes, the first three scale the media files to fit them into the screen width or height keeping the file's aspect ratio. The others stretch the media files to fit a certain aspect ratio.
To keep it simple, the description refers to the "output size". In fact, the scaling depends on the aspect ratio of a Camera device which can be set up in the Camera Inspector. Per default, the Camera's aspect is linked to the Output's aspect which again depends on the resolution of a connected display.
Important note in case you are using outputs with different resolutions. Note that all scaling modes apply to each Site individually but not individually for each Camera. For example, if you have two displays with a different resolution connected to two Servers, both displays will show a Layer with the setting "Horizontal Fit" as large as their own screen width. However, if you connect both displays to a single Server, the result will be different. This is because the scaling happens once per Site and depends on the Camera with the larger aspect ratio.
|
|
Media Pixel SizeWhen the layer sizing mode is set to "Media Pixel Size", the media file is displayed with its native aspect ratio and size. It is not stretched nor scaled. As this example shows, keep in mind that displays with different resolutions do not look the same because displaying a media file with its native resolution takes up more or less space per output! |
|
|
Fit larger sideWhen the layer sizing mode is set to "Fit larger side", the media file is displayed with its native aspect ratio but it is scaled until it fits one screen side. Depending on the resolution of the image and output, this is either the screen width or height. In this example, the image is scaled to fit the height which has the same result as the setting "Vertical fit". |
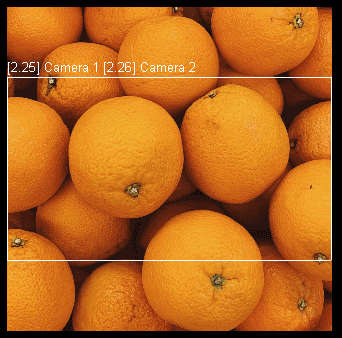 |
Horizontal fitWhen the layer sizing mode is set to "Horizontal fit", the media file is displayed with its native aspect ratio but it is scaled to fit the screen width. |
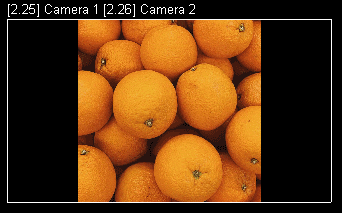 |
Vertical fitWhen the layer sizing mode is set to "Vertical fit", the media file is displayed with its native aspect ratio but it is scaled to fit the output's height. |
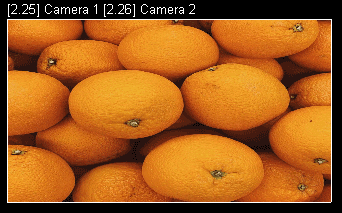 |
5:4 - 4:3 - 16:10 - 16:9 - 1.85:1When the layer sizing mode is set to one of the fixed ratios, the media file is stretched and also scaled to fit the screen width (which is always 16 units). |
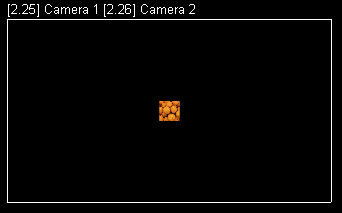 |
1:1When the layer sizing mode is set to one "1:1", the media file is stretched to be 1 unit wide and 1 unit high, whereas the screen width is always 16 units. |