Loading...
This chapter explains how to add an effect to a Layer, access its parameters and how to remove it again. The effects themselves can be found in the chapter "FX List". The following chapters explain how to re-order effects or copy them.
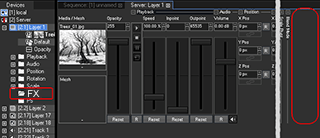 |
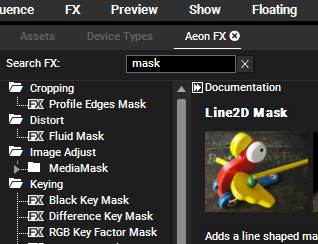 To add an effect to a Video Layer, or Output device, please open the "Aeon FX" tab, which is part of the View called "FX". In case you closed it, please click on "Tabs" in the Toolbar and choose "Aeon FX". You can browse through the FX folders or use the "Search FX" field. If you click on an effect, the right side shows more information about it. The "FX Explorer" allows to try and toggle between various effects. Simply, right-click an effect to launch it. |
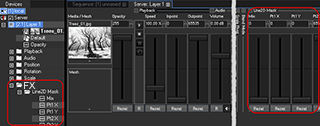 - select a layer first (multi-selection is possible with the [Ctrl] key) and then double-click the desired effect - choose the effect and drag and drop it onto the Layer in the Device Tree tab - choose the effect and drag and drop it onto the Device Controls tab, into an empty area right to the default parameter faders. Now, the Device Tree and Device Controls tab show the new effect next to the standard parameters. The new section is always titled with the name of the effect. |
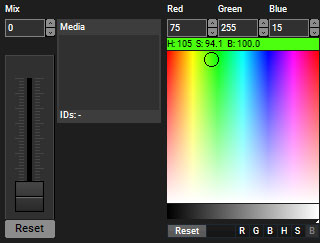 To apply the effect, set the "Mix" fader to 255. "Mix" defines how much the effect is mixed to the image / video file. Most effect parameters are fader controls which are explained in the chapter about the Device Control tab. Some effects also allow to assign a media or mesh. If a color can be adjusted, you will see a standard color picker field. How to use the Color PickerThe Color Picker is based on the RGB (Red, Green, Blue) color model and includes faders for HSB (Hue, Saturation, Brightness). You can pick a color directly from the color field. First click into the white area to increase the brightness, and then click into the color field. The horizontal color fader and the color field depend on the parameter at the bottom of the color picker (R,G,B,H,S or B) which is "B" (Brightness) per default. You can also enter values for red, green and blue manually above the color field. Note that the bar between the field and the values show the corresponding values for HSB and is colored in the chosen color instantly. If you want to see the color in the color field (marked with a black outlined circle), click the white arrow.
Of course, you can also control effect parameters using the SDK or Widget Designer, e.g. through interactive devices like the AirScan or sensors like Phidgets and more. To do this, you need to know the exact parameter name which is case-sensitive and all spaces count. Further, the effect name is followed by the pipe "|" character and then the effect parameter name, e.g. Line 2D Mask|Mix or Line 2D Mask|Red. The effect names and parameter are shown in the Device Control tab but also in the Device Tree when unfolding entries, which helps, if a name is quiet long. |
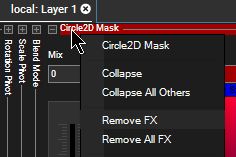 You can either use the Device Control tab, right-click on the effect's name and choose "Remove FX" or "Remove All FX". Or you can use the Device Tree. Right-click an effect to remove it or right-click a layer for the option to "Remove All FX". If you saved values from the effect to the timeline(i.e. there are Containers with Keys on the Layer) a warning pops up as those keys will be automatically deleted. |