MADI Sound Card (Discontinued)
Loading...
This chapter describes the optional MADI audio card.
The MADI audio card allows to input and output audio (in accordance with the ASIO protocol) to and from Pandoras Box.
 |
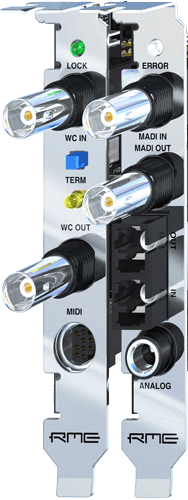
The MADI board carries: MADI in / out (optical and coaxial) Stereo Analog Out (Phones)
The included expansion board carries: Word Clock in / out (BNC) MIDI in / out (via four 5-pin DIN jacks)
The MADI interface offers to record and playback 24-bit audio with The word clock input is galvanically isolated via transformer and operates on both single and double speed signals automatically. The MIDI solution offers two completely independent MIDI inputs and outputs via breakout cable (4 DIN sockets). A virtual MIDI port allows for a direct transmission of MIDI data over MADI. |
The card drivers are preinstalled on your Server or Player hardware. All drivers can be found locally under C:\system and in the Download-Center where you can also check for updates.
The following picture shows the Windows Device Manager and a correctly installed 64ch MADI card in the folder "Audio-, Video and Gamecontroller".

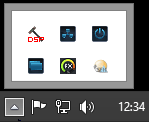
 The Configuration of the 64ch MADI card is done via its own settings dialog. It can be opened by clicking on the hammer symbol in the system tray. Regarding the Clock Source drop-down list in the Clock Mode section, the 64ch MADI can be configured to use its own clock (Internal = Leader), or one of the input signals (Word, MADI, TCO, Sync In). If the selected source is not available (NoLock), the unit will change to the next available one (this behaviour is called AutoSync). If none is available then the internal clock is used. The card is equipped with SteadyClock(TM), RME's sync and clock technology. With this, the device becomes a sync reference for other devices too. SteadyClock refreshes clock signals, removes jitter, and takes permanent care of optimal conversion quality. SteadyClock allows the MADI card to control the sample rate freely on its own. Any changes made in the Settings dialog are applied immediately - confirmation (e.g. by clicking on OK or exiting the dialog) is not required. However, settings should not be changed during playback or record if it can be avoided, as this can cause unwanted noises. Also, please note that even in 'Stop' mode, several programs keep the recording and playback devices open, which means that any new settings might not be applied immediately. The status displays at the bottom of the dialog box give the user precise information about the current status of the system, and the status of all digital signals. The digital real-time mixer, the "Hammerfall DSP Mixer" (TotalMix) can be opened by clicking on the mixer icon in the system tray. For more information about the Settings and Mixer dialog please see the audio card's manual: http://www.rme-audio.de/download/hdspemadi_e.pdf |
To work with audio in- and outputs requires that the sound card is set up in the Configuration tab under ASIO Audio. The linked chapter explains in detail how to do so and includes information regarding synchronization, timecode, sample rate setup and sample accurate audio and main volume.
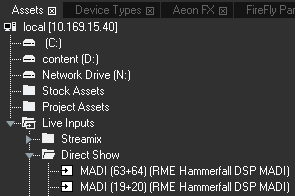
To output ASIO audio from Pandoras Box, simply assign audio files from the Project tab to the dedicated Audio tracks in the Device Tree or Sequence. Audio tracks allow to playback ASIO WAV files and inputs while being synchronized to a leader clock. The tracks play mono and stereo PCM Wave files (16, 24 or 32bit) and they refer to the sample rate set in the Configuration tab. In order to assign a track to a specific audio channel of your ASIO sound card, please refer to the Track Inspector.
The Pandoras Box Software License offers unlimited Audio Tracks. Note that in a larger Manager-Client-setup it is possible to use either a single audio card or multiple ones and it is possible to use the audio card from the Manager or from the Client.

It is also possible to record the incoming signal. However, the Client computer must then be started in stand-alone mode, that is with the Pandoras Box Manager software. Please see the chapter " Video Recording" for more information.