This chapter explains how to interact directly with Layers and Cameras in the Preview. For other topics regarding the Preview tab please see the introductory chapter. The chapter "Navigating in the Preview" explains how to pan, rotate and zoom the Preview. All keyboard shortcuts are listed on the Shortcut page.
The Layer Mode allows to select, move, rotate and scale Layers directly within the Preview interface. For further Layer interaction please see the next chapter about "Layer Picking".
The Camera Transformation Mode allows to select and move Cameras directly within the Preview interface. Please go to the "All Cameras" view first.
In both modes you can:
- move the selected Layer or Camera; Layers can also be rotated and scaled
- open the dialog "Parameter Floater" showing the parameters from the selected Layer or Camera
- set a constraint, e.g. an activated (blue highlighted) X constraint transforms along the X-axis only
- toggle the Layer and Camera Gizmo
|
Layer Mode
First of all, please go to the
"All Cameras" view and then activate the Layer Gizmo

, the button should be highlighted in blue.
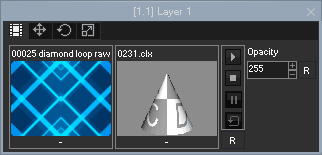
Select a Layer by clicking on it in the Preview or the Device Tree. Now, the handles for the X, Y and Z-axis of the selected Layer are shown in the Preview, as seen in the left image. The so called bounding box and the Device ID of the selected Layer are shown as well in dark blue (in this example: device ID 1.1).
Now, choose whether you would like to move, rotate or scale the Layer (shortcut [1],[2],[3]) by clicking on the according button above the Preview. Click anywhere on the Layer and drag it. Note that the transformation is applied in the XY-plane. When holding the [Shift] key, the transformation will be applied along one axis only. For example if you move the mouse from left to right the X-axis is taken but as soon as the up-down movement is greater, the Y-axis is taken.
If you now position the mouse pointer on one handle of the Gizmo, it is highlighted in orange. Dragging the mouse results in a transformation along one axis. You can also work in another plane by highlighting one of the corners shown in magenta, cyan and yellow.
As an alternative to working in distinct axes, you can apply constraints. With an activated X Constraint (shortcut [X]) the Y and Z-axis are shown in gray and any transformation happens along the X-axis only.
For the Rotation and Scale Mode you can also change the Pivot point. Drag the Layer whilst holding the [Alt] key. The topics about the Rotation Pivot and Scale Pivot show how a moved Pivot affects the transformation.
To multi-select several Layers, press [Ctrl].
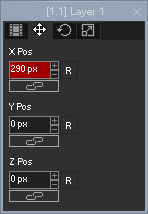
The Parameter Floater (shortcut [Ctrl + P]) shows the most important parameters from the selected Layer. Of course they are synchronized with the Device Control tab. You can choose to see the parameters for Media Control, Position, Scaling or Rotation. |
Camera Transformation Mode
First of all, please go to the "All Cameras" view and activate the Move mode.
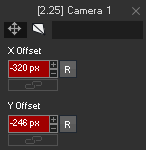
If you now click on the Camera rectangle it highlights blue and you can drag it around. This changes the X and Y Offset parameters.
Note that constraints work in the same way as for Layers. When holding the [Shift] key, the transformation will be applied along one axis only. For example if you move the mouse from left to right the X-axis is taken but if the left-right movement is smaller than the up-down movement, the Y-axis is taken.
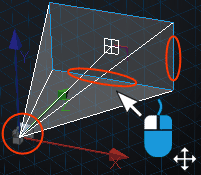
Alternatively, you can apply constraints with the X,Y buttons. Cameras of a Server have more parameters available: the Viewpoint and Target XYZ position. First, highlight the "Camera Visibility" button  and the Camera Gizmo . Now you can either drag the Camera icon around which influences the Camera Viewpoint and Target simultaneously, or you can drag the Viewpoint and Target separately. Hold the [Alt] key down to move the Camera / Viewpoint only and the [Alt] and [Shift] key for the Target. The interaction with the Gizmo works in the same way as for Layers. and the Camera Gizmo . Now you can either drag the Camera icon around which influences the Camera Viewpoint and Target simultaneously, or you can drag the Viewpoint and Target separately. Hold the [Alt] key down to move the Camera / Viewpoint only and the [Alt] and [Shift] key for the Target. The interaction with the Gizmo works in the same way as for Layers.
|
The Parameter Floater (shortcut [Ctrl + P]) shows the parameters of interest for the selected Camera. Of course they are synchronized with the Device Control tab. You can see the parameters for Lens Shift and for Serves also the Viewpoint and Target. |
The next chapter explains the Picking Mode.